

A workflow in FlutterFlow is the chain of actions that runs after an event, which can be a tap, a form submit, a page load, or a state change, and the quality of that chain determines whether your app feels stable or fragile. Beginners often focus on screens first, because UI gives instant visual feedback, but workflows are where real app behavior lives, which means a clean layout can still produce a broken experience when the action sequence is unclear.
When you approach workflows like a professional, you stop thinking in terms of “add a button and hope it works,” and you start thinking in terms of inputs, state transitions, side effects, and outputs. That mental shift is what makes your builds faster, because fewer bugs appear later, and the bugs that do appear become easier to diagnose.

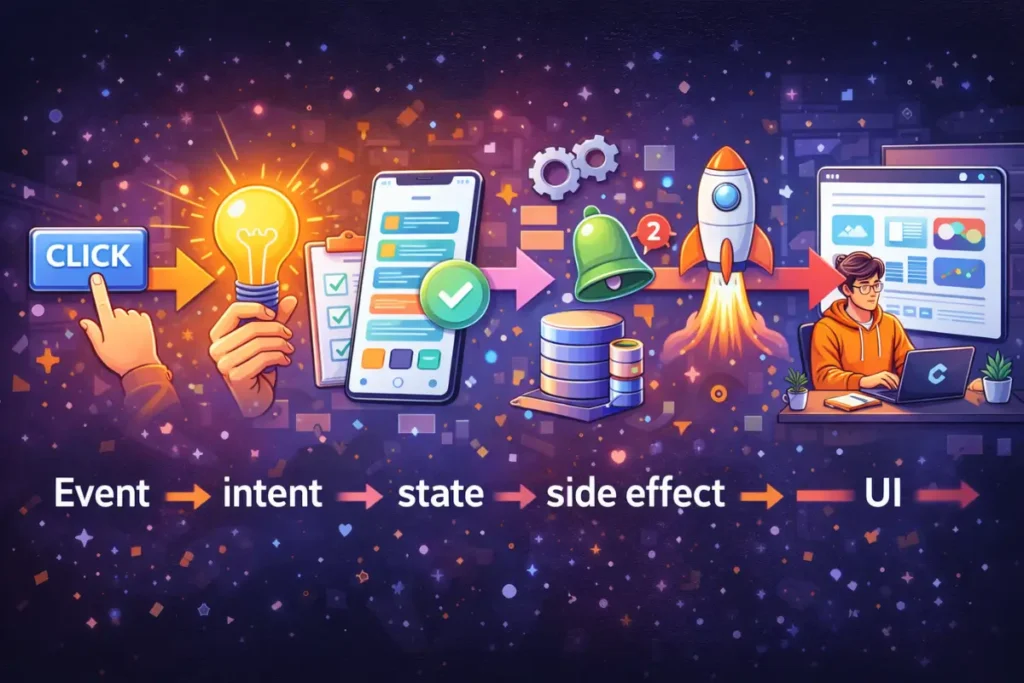
The pro mental model: event → intent → state → side effect → UI
A reliable workflow almost always follows the same structure, whether you are saving a profile, creating a record, or calling an API.
1) Event
An event is the trigger, and it should be clear and specific, because ambiguous triggers lead to accidental actions and confusing UX. A button tap is simple, while a page load with multiple side effects needs more careful design.
2) Intent
Intent is the “why” of the workflow, which keeps you from adding actions that do not belong. If the intent is “create a task,” then everything in the workflow should serve record creation, confirmation, and UI consistency, rather than unrelated navigation or styling tweaks.
3) State
State is the memory your UI relies on, and it includes local widget state, app state, page parameters, and authenticated user context. Most workflow bugs come from state confusion, such as updating a record but displaying an old list because the UI still points to stale query results.
4) Side effects
Side effects are anything that touches the outside world, such as database writes, API calls, file uploads, and auth operations, and a pro workflow treats side effects as operations that can fail, time out, or return unexpected data.
5) UI output
The workflow should always decide what the user sees next, which includes success feedback, navigation, and error messaging, because silent failures create the feeling that FlutterFlow is unreliable even when the issue is simply missing error handling.
Once you internalize this model, you can build almost any feature by designing the chain before you drag widgets onto the canvas, and that is the moment workflows start feeling easy.
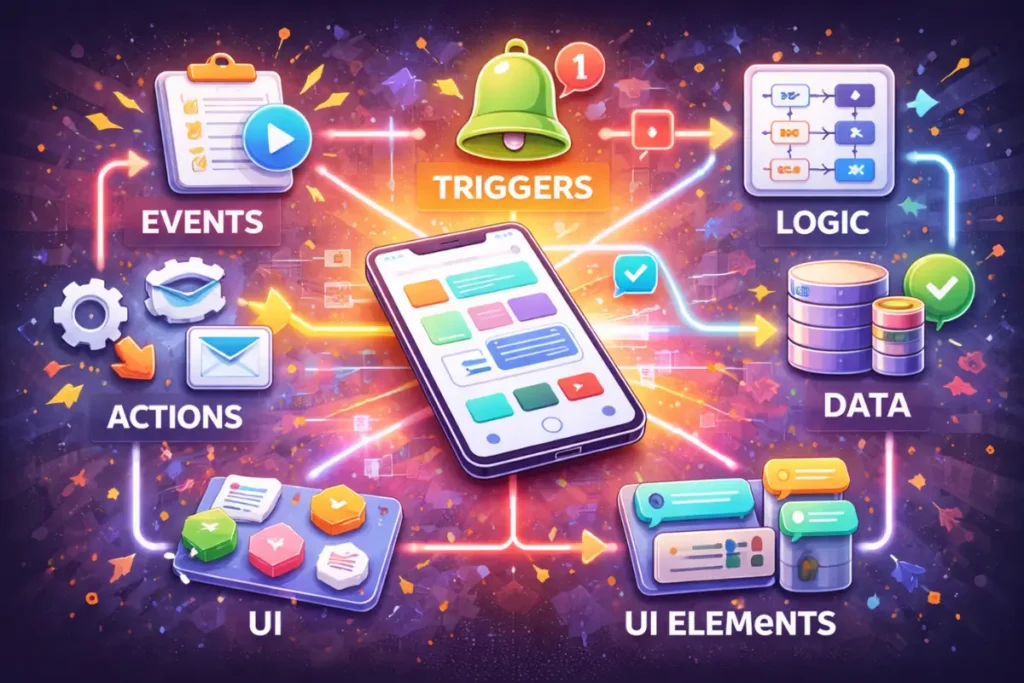
Workflow building blocks that matter most
Triggers that stay predictable
You will build faster when you use the simplest trigger that matches your intent, because complex triggers create hidden dependencies. A tap action is ideal for most flows, while page-load actions should be reserved for fetching data or initializing state, and even then you should keep them minimal so the page does not become a “mystery box” of background logic.
Action sequences that read like a checklist
A professional workflow reads like a short checklist that you can explain out loud. For example: validate form → show loading → create record → update state → refresh list → show success → navigate back. When the sequence is explainable, it is easier to debug, and it becomes easier to reuse across screens.
Conditions and branching without chaos
Conditional actions are powerful, but branching can become messy when you treat every edge case as a new fork. A pro approach uses a small number of meaningful branches, such as “valid input vs invalid input” and “success vs failure,” and it avoids deep nesting by simplifying logic and using early exits when appropriate.
State discipline that prevents phantom bugs
State is where beginners lose time, because global state feels convenient until the app grows. A professional habit is to keep state local unless multiple screens truly need it, then to pass parameters explicitly rather than relying on hidden globals. This habit reduces “why did this change” moments, and it makes UI updates more predictable.
Backend operations that assume failure
Database writes and API calls should always be treated as operations that can fail, so your workflow should define what happens on errors, what the user sees, and whether you retry or ask the user to try again. This mindset alone makes your app feel dramatically more professional, because users never end up stuck without guidance.
UI feedback as part of the workflow, not a decoration
Loading indicators, disabled buttons during processing, and success or error messages are not optional polish, because they are how you communicate state to the user. When you include these consistently, you reduce double-taps, accidental duplicate records, and user confusion, while also making your testing faster because you can see what is happening.
Step-by-step learning roadmap for workflows
This roadmap is designed to help you build workflow skill in the fastest order, because learning advanced actions before you can build reliable CRUD flows tends to create frustration.
Step 1: Master the “CRUD loop” first
You should become comfortable with create, read, update, and delete flows, because most apps are variations of CRUD plus navigation. The goal is not just making it work once, but making it work reliably with empty data, slow network, and different devices.
Step 2: Add validation and guardrails early
Once CRUD works, you add form validation, role-based visibility, and basic permissions, because these guardrails prevent the most common production failures. You will also learn to treat “invalid input” as a normal branch rather than an unexpected scenario.
Step 3: Learn query refresh and state-driven UI
You should then focus on keeping UI consistent after side effects, which means understanding how lists refresh, how state updates propagate, and how parameters drive detail pages. This is where many beginners feel stuck, because the UI looks correct but does not update, so mastering this step saves enormous time later.
Step 4: Introduce APIs with clean error handling
When you add APIs, you should practice safe parsing and clear user messaging, because workflows that depend on external services must handle null fields, slow responses, and unexpected formats. A disciplined API workflow is usually the difference between a demo and a shippable feature.
Step 5: Add advanced workflows only after the foundation is stable
Advanced workflows include multi-step wizards, background syncing, file uploads, and custom actions, and they become far easier once your foundation is strong. At this stage, you can also start using official references more effectively, because you understand what to search for and how to test outcomes.
For ongoing accuracy, the FlutterFlow documentation is the best place to confirm how actions, state management, and API calls behave, while the official Flutter documentation helps you understand mobile UI and navigation concepts that influence how your flows should feel.

Mini example workflow: “Save Profile” that never feels buggy
This example stays conceptual, so you can apply it to many app types, and it illustrates what “pro workflow thinking” looks like in practice.
Goal
A user edits name, email, and a short bio, then taps Save, then the profile updates everywhere, and the app never shows stale data or silent failures.
Workflow design
- Validate inputs with clear rules, so name is required and bio has a reasonable limit, and show inline errors rather than generic alerts.
- Disable the Save button while processing, so the user cannot create duplicate requests and you avoid race conditions.
- Show a loading indicator in a subtle way, such as a button spinner or a small overlay, so the user understands the app is working.
- Perform the update operation, whether that is a database update or an API call, and capture the result in a predictable structure.
- On success, update the relevant state, refresh the profile query if needed, and show a short success message that confirms completion.
- On failure, keep the user on the same screen, restore the Save button, show an error that suggests a next action, and preserve the form values so the user does not lose work.
- After success, navigate back only if it improves UX, because automatic navigation can feel jarring if the user expects to stay on the form.
Why this feels “pro”
This workflow controls state, prevents duplicates, handles failures, and updates UI consistently, which means the user never wonders what happened, and you never wonder why the app looks out of sync.
Beginner plan: 7 days to feel confident with workflows
This plan works well if you want to learn by building features that force you to practice workflow fundamentals repeatedly.
Day 1: Build a simple create flow with validation, then test it with empty input, long input, and repeated taps so you learn how guardrails prevent bugs.
Day 2: Build a list and detail flow with parameters, then confirm that opening a detail page always receives the correct record ID and never relies on hidden state.
Day 3: Add update and delete flows, then ensure the list reflects changes immediately and the UI never shows removed items without explanation.
Day 4: Add loading and empty states to every data screen, then test with zero records and slow network to see whether the experience stays clear.
Day 5: Add a simple filter and sorting workflow, then confirm that state changes are reflected without broken queries or stale UI.
Day 6: Add one API call with clean error handling, then test failure states on purpose so you learn how to debug responses and parsing.
Day 7: Ship a small MVP build to a tester, then fix the top three workflow issues you discover, because shipping feedback is where your workflow skill becomes real.
Focused plan: 30 days to build workflows like a professional
This plan is ideal when you want a structured path to competence rather than scattered practice.
Days 1–7: Workflow foundations
You build CRUD loops, validation, and consistent UI feedback patterns, while documenting your “standard workflow template” so you can reuse it.
Days 8–14: State and query mastery
You focus on local versus app state, parameter passing, query refresh strategies, and consistent screen-to-screen data flow, because these skills eliminate the most common workflow failures.
Days 15–21: Integrations and reliability
You add APIs, handle optional fields, implement robust error states, and practice defensive workflow design so external failures do not break your app experience.
Days 22–30: Advanced patterns and shipping discipline
You build one multi-step flow, improve performance basics, refine UX, and produce a release-ready build with a checklist-driven testing routine.
Tutorials vs Course vs Bootcamp
Choosing the right learning format can directly affect speed, because the wrong format often creates rework, confusion, or stalled motivation.
flutterflow tutorial
Pros: fast for a single feature, great for unblocking a specific bug, and easy to fit into active project work.
Cons: easy to create patchwork logic, and hard to build a consistent mental model across multiple creators and patterns.
flutterflow course
Pros: gives a clear sequence, reduces decision fatigue, and usually covers the glue skills that connect screens, data, and workflows into a stable app.
Cons: can feel slow if you watch without building, and quality varies depending on whether projects include real error handling and shipping steps.
flutterflow bootcamp
Pros: can be the fastest when accountability and feedback are the bottleneck, because tight deadlines push you to ship and fix quickly.
Cons: intense pacing can be inefficient if your schedule is inconsistent, and the experience depends heavily on instructor feedback quality.
flutterflow training
Structured practice with guided feedback can be the best option for teams or learners who need repetition and review, because workflow skill improves quickly when someone points out hidden state issues and sequencing mistakes.
If your goal is to learn flutterflow for beginners with fewer wrong turns, a structured program often reduces rework, while tactical tutorials can still help when you are stuck on a specific action pattern.
Practical checklist: Workflow quality like a pro
Use this checklist before you call a feature “done,” because it catches the issues that cause most “FlutterFlow is buggy” complaints.
Workflow clarity
- the intent is clear and matches the trigger
- the action sequence can be explained as a short checklist
- the workflow has a success path and a failure path
State and UI consistency
- state changes are local unless multiple screens need them
- parameters are passed explicitly to detail screens
- lists and details refresh after create, update, and delete
Validation and guardrails
- required fields are enforced
- the user cannot double-submit
- destructive actions require confirmation
Feedback and reliability
- loading states are visible and non-annoying
- empty states guide the user toward the next action
- errors are actionable and do not erase user input
Testing discipline
- tested with empty data and many records
- tested with slow network and API failures
- tested with logout states and permission boundaries
FAQ
1) Why does my workflow work once and then stop updating the UI?
This usually happens when state is not refreshed or the UI still depends on stale query results, so you should verify query refresh behavior and confirm that the UI reads from the updated source of truth.
2) How do I design workflows that do not become messy over time?
You keep a standard sequence template for common flows, you minimize branching, and you store state locally whenever possible, because predictability is what prevents complexity from exploding.
3) When should I use custom actions instead of built-in actions?
You should use custom actions only when built-in actions cannot express the requirement cleanly, because smaller built-in workflows are easier to debug and maintain.
4) What is the fastest way to become good at workflows?
You build the same CRUD and validation patterns repeatedly across different screens, and you deliberately test failure scenarios, because repetition plus edge-case testing creates real competence.
5) Can I learn workflows without understanding backend concepts?
You can start, but you will progress faster when you understand basic data modeling, permissions, and API behavior, because workflows depend on predictable data and reliable side effects.
6) How do I stop relying on copying and start building confidently?
You rebuild flows from memory, you change requirements on purpose, and you use the documentation as a reference rather than a script, because that is the transition from copying to understanding.
How to choose your fastest learning path
If you want to learn flutterflow in a way that compounds, you should combine structure with active building, because watching content alone rarely produces speed. If you want how to learn flutterflow with fewer gaps, you can use a structured outline from a program and then use targeted tutorials only as tactical tools. If you want to learn flutterflow from scratch, you should start with CRUD and state-driven UI, then graduate to APIs and multi-step flows after the foundation is stable. If you want the best way to learn flutterflow, you should optimize for shipping small apps with checklists and deliberate edge-case testing rather than collecting random features.
Many learners start with a flutterflow complete course outline to avoid decision fatigue, then they use a flutterflow tutorial when they hit a specific obstacle, and they later consider flutterflow courses that include projects and release steps when they want consistent growth. A well-structured flutterflow course can also be faster than piecemeal learning when you want to build end-to-end skills, while a flutterflow full course can be useful when you want one coherent sequence that covers UI, data, workflows, and shipping.
If you want a structured path, here’s a full FlutterFlow course: {PASTE_LINK}
Conclusion
Understanding workflows like a pro is less about memorizing buttons and more about designing predictable sequences that manage state, handle side effects safely, and always communicate clearly to the user. When you adopt the event-to-output mental model, build with guardrails, and test failures intentionally, your FlutterFlow apps become stable and easy to extend, and your development speed increases because rework disappears.